5.30.2010

Spiced Chicken with Couscous

IMG_7098
It is not even June and it is some kind of hot around here.  Sheesh... I want to melt just thinking about the idea of late July.  Since I can't control the blazing temps, I've decided to move on to enjoying the great produce that comes along this time of year.  It's always nice to find a filling and light meal that tastes especially great with summer tomatoes.  I also love any recipe centered around couscous since it is about the simplest thing you could possibly make in the kitchen.  So if you are looking for an easy, summery dish, give this one a try.

From my little kitchen to yours... Enjoy.
IMG_7093
IMG_7091IMG_7094
Spiced Chicken with CousCous
Serves 4
Adapted from Real Simple
Recipe Notes
I went ahead and made four portions of this and it made great leftovers for lunch the next day.  It can be served cold, hot or room temperature.  If you are going to eat as leftovers, you can heat the chicken but serve the couscous salad at room temperature. 
Ingredients
3 tablespoons olive oil
4 boneless, skinless chicken breasts (6 ounces each)
1 teaspoon paprika
2 teaspoons ground cumin
kosher salt and black pepper
3⁄4 cup couscous
3/4 pound cherry or grape tomatoes, quartered
1/4 pound snap peas, thinly sliced crosswise (about 1 cup)
1/2 cup torn fresh basil
1/2 teaspoon grated lemon zest plus 2 tablespoons fresh lemon juice
Step by Step
Heat 1 tablespoon of the oil in a large skillet over medium heat. Season the chicken with the paprika, cumin, ½ teaspoon salt, and ¼ teaspoon pepper and cook until golden brown and cooked through, 6 to 7 minutes per side; transfer to a plate a wrap with foil to keep warm.

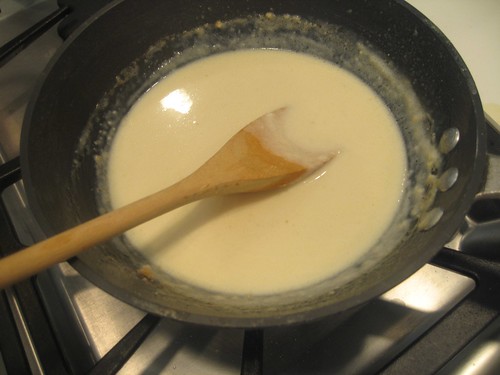
Meanwhile, bring 1 cup of water and 1 tablespoon of salt to a boil.  Once boiling, remove from heat, add couscous and cover.  Let rest off of heat for 5 minutes; fluff with a fork.  Add the tomatoes, snap peas, basil, lemon zest, lemon juice, the remaining 2 tablespoons of oil, ½ teaspoon salt, and ¼ teaspoon pepper and toss to combine.


Slice the chicken and serve over the couscous salad.

5.25.2010

Sesame Chicken Lightened Up

IMG_6972
I sure do love a good night of takeout. However, we make almost all of our meals at home during the week and to be honest, I still haven't found my absolute favorite chinese place that would deliver around here.  The combination led me to find a good sesame chicken recipe.  And the fact that it is healthier is always a bonus.  If you took my advice and froze some of these, bust them out of the freezer and add some edamame and you'll have a great little takeout meal from home.

From my little kitchen to yours... Enjoy.
IMG_6963
IMG_6961IMG_6966
Sesame Chicken Lightened Up
Serves 2 main dishes; Serves 3-4 with other dishes
Adapted from Martha Stewart Everyday Food
Ingredients
3/4 cup brown rice

3 tablespoons honey
2 tablespoons sesame seeds
2 tablespoons soy sauce
1 garlic clove, finely chopped or crushed with a garlic press
2 large egg whites
1/4 cup cornstarch
1 pound boneless, skinless chicken breast halves, cut into 2-inch chunks
Coarse salt and ground pepper
2 tablespoons vegetable oil
4 scallions, thinly sliced
1 pound broccoli, cut into large florets, stems peeled and thinly sliced
Step by Step


Place a steamer basket in a large saucepan, and fill with 2 inches of water… set aside for broccoli. Cook rice according to package.

Meanwhile, make sauce: In a small bowl, combine honey, sesame seeds, soy sauce, and garlic; set aside. In a large bowl, whisk together egg whites and cornstarch. Season chicken with salt and pepper; add to mixture and toss to coat.

In a large nonstick skillet, heat 1 tablespoon oil over medium-high. Add half the chicken; cook, turning occasionally, until golden and opaque throughout, 6 to 8 minutes. Add sauce and scallions, and toss to coat.

Meanwhile, place saucepan with steamer basket over high heat; bring water to a boil. Add broccoli, and cook until crisp-tender, 4 to 6 minutes. Serve sesame chicken with broccoli and rice.


IMG_6973

5.18.2010

Cookies & Cream Cupcakes

IMG_7014
Nothing much to say today... Just a really good recipe.  I will try to be more entertaining tomorrow.  Happy Tuesday (can Tuesday be a happy day? it's so far from Friday...)

 I posted about these for an order I did a couple of weeks ago and here is the follow up with the recipe.  I have actually made a simplified version to share with you because I don't see the need to make the cupcake from scratch.  It was good, but what is so special about this is the icing.  If you want to go the extra step and make the original cupcake, email me, but I will probably never again do so myself.

 From my little kitchen to yours... Enjoy.

Cookies & Cream Cupcakes
Recipe Notes
If you have a favorite brand of chocolate cake mix, use it! I just have found that I really like the Devil's Food chocolate.
Ingredients
1 box devil's food cake mix
1 cup (2 sticks) butter, room temperature
3 cups powdered sugar
2 teaspoons milk
1/4 cup Oreo crumbs (remove the icing and finely crush the cookies), plus additional for topping
Step by Step
Prepare chocolate cupcakes according to directions on box and allow to cool completely.

Mix the butter on medium speed until light and fluffy.  Gradually add the powdered sugar, then add the milk and blend until smooth.  Using a spoon (not mixer) fold in the Oreo crumbs until blended through the frosting.  Top each cupcake with frosting and garnish with extra cookie crumbs.

5.16.2010

Lemon Arugula Pasta

IMG_7054

This is my first official garden to table recipe (if you can consider a "garden," a pot on my concrete driveway and a "table" the tv tray that Mr. Hungry and I ate this on while we watched Lost).  Well, whatever you consider it I am very proud of the arugula in this dish.  I grew it from seed and I still consider it a complete miracle.  If you have been following me for awhile, you might have caught this disaster, but the only slightly green thumb thing I have ever done is to keep a few basil and parsley plants alive for a couple of weeks.

I wanted to try my hand at really growing something and arugula fit the bill perfectly.  You see, I often use a sprinkle of arugula on pizza or in a pasta, but you have to buy a huge tub for about five bucks and the rest goes to waste.  So I thought it was a perfect thing to try and grow.

This was such a great and refreshing summer pasta... now all I have to do is wait a month or two for more arugula.  This whole growing what you eat thing is exhausting.... but delicious.

From my little kitchen to yours... Enjoy.
IMG_7051


IMG_7052


IMG_7053

Lemon Arugula Pasta
Serves 4
Ingredients
1 pound spaghetti, dry
1/2 cup olive oil
2 tablespoons butter
1 tablespoon minced garlic
1 tablespoon grated lemon peel
1/4 cup fresh lemon juice
1/4 cup chicken broth
1/2 teaspoon salt
1/8 teaspoon freshly ground pepper
1 cup baby arugula
1/2 cup chopped fresh parsley
2 tablespoons chopped fresh basil

1/2 cup shredded parmesan cheese, plus more for serving
Sea salt and pepper
Step by Step

Cook spaghetti in a large pot of salted boiling water. Meanwhile, in small saucepan, heat oil and butter over medium-low heat. Stir in garlic, lemon peel, lemon juice, broth, salt and pepper and raise heat to medium-high. Bring to a gentle simmer, reduce heat and simmer 3 minutes.

Drain pasta, return it to its cooking pot and immediately pour the heated sauce over it, along with the arugula, parsley and basil. Use tongs to gently toss the pasta and sauce together. Top with extra parmesan cheese and salt and pepper to taste.  Serve hot. 

5.13.2010

my mom's banana nut bread

IMG_7088

There are some foods that are made a thousand ways and everyone has their "special" way of making it. You know, that special chocolate chip cookie or that family recipe for chili.  Banana nut bread is one of those things people put all kinds of ingredients in and no matter how many I try, I cannot find one I prefer more than my mom's banana nut bread.  I never bite into this bread without having tons of memories of family road trips and holiday baking days.  My mom would even send me these in college and would bake up a batch any time we would go on road trips with friends.  Not until I baked them myself did I realize that there are ingredients in here that make them a little different and special.

Last week, I got an email from a reader (hi, Kimberly) who was wondering if I had a good recipe for banana bread.  I was thrilled to be able to share this one and can't believe I haven't posted this earlier.  So, here's my favorite and I hope you enjoy it as much as I do (thanks, Mom).

From my little kitchen to yours... Enjoy.

Banana Nut Bread
Recipe Notes
My favorite way to eat this is to make a loaf and make big slices to eat, but when you are making them for a crowd or want a great portable way to keep them, I choose the muffin form.  The only other key is to make sure you have very, very ripe bananas.  I mean, you almost want them black because it provides the best flavor.
Ingredients
3 cups flour
1 teaspoon baking soda
1 teaspoon salt
2 teaspoons cinnamon
2 cups of sugar
1/4 cup vegetable oil
1 1/2 teaspoons vanilla
1 8 oz can of crushed pineapple (with the juices)
3 eggs, beaten
2 cups mashed very ripe bananas (about 4 medium sized bananas)
1 cup chopped pecans
Step by Step
Preheat the oven to 350 degrees.  In a medium sized bowl, sift together the flour, baking soda, salt, cinnamon and sugar. In a separate bowl, add the oil, vanilla, pineapple, eggs, bananas and pecans.  Stir together until well combined.  Add the liquid mixture to the dry ingredients and stir until just combined.  

To bake into muffins:
Line two 12-cup muffin tins with liners.  Fill each cup almost full.  Bake 18 to 20 minutes, until a toothpick tests clean.  Do not over bake.
makes 24 muffins

To bake in loaves:
Fill two loaf pans evenly with batter.  Bake for 1 hour 20 minutes, until a toothpick tests clean.
makes two loaves
IMG_7090

5.11.2010

a cupcake factory

Okay, so I'm not exactly a cupcake factory, but it feels that way a bit. I have made quite a few in the last week. I have loved each and every batch and just wanted to share. Things have been slowing down a bit around here (by around here, I mean this blog... definitely not in my life or the little kitchen, but that's usually a direct correlation to not being able to share as much!) and I will try to get back on top of things and get back to some recipes because yes, we have still been eating. So for now, here are some toppers...

These were double lemon cupcakes that were ordered for a festive mojito filled 30th birthday party...
IMG_7057

And these were cookies and cream cupcakes ordered for an engagement party...
IMG_7014

and there was my friend's birthday...Happy Birthday Mel!
IMG_7060

5.07.2010

Pasta Making Party

IMG_6924

I lose track of how much I have shared about myself on here (and still a little bit shocked that other people besides my parents read this blog),  but in case you don't know, I work at a private school in the development office.  Every other year, our school has a gala to raise money for the school. Faculty and staff offer different things in order to raise money so I decided to throw a pasta making party with my coworkers.  A couple of years ago, I learned to make fresh pasta in Florence, and while I could go on for hours about that (and one day I will), right now I just wanted to tell you about our party.

I just hope everyone had as much fun as I did. We had a wonderful brie for an appetizer, fresh pasta with three sauces, and a lemon blueberry tart for dessert. Oh yeah, and chewy amaretti nutella sandwiches as a favor. It was a fun party, but I will say everyone definitely worked for their lunch.  Homemade pasta is a labor of love, but well worth the effort.  After 3 hours of cooking and eating, I needed someone to roll me out of there. I'll be back with all of the recipes and hope at least someone out there will attempt to make homemade pasta... seriously it's worth it.


First, we ate a wonderful brie topped with sun dried tomato pesto that my boss, Allison, made...
IMG_6917
Then, it was on to make pasta...
IMG_6898
Lots of long strips of pasta being made...
IMG_6913

And there were sauces being made...
IMG_6912IMG_6911
Then, on to drying...
IMG_6908

IMG_6920
Finished off with a delicious lemon blueberry tart made by my coworker, Frances.
IMG_6918
IMG_6885


5.05.2010

Lemon Sorbet Margaritas

IMG_7024

Happy Cinco de Mayo! I don't know about all parts of the country, but it is officially hot down here.  So to combine the idea of our 95 degree weather, with Cinco de Mayo, I thought I would share a very refreshing drink.  This is so simple that you could easily make it a part of your celebration tonight, but it's also a good choice for the rest of the blazing summer I am sure we have awaiting us.

From my little kitchen to yours... Enjoy.
IMG_7041

Lemon Sorbet Margaritas
Adapted from Real Simple
Ingredients
1 lime, cut into 4 wedges
1/4 cup sugar
1 pint lemon sorbet
1/4 cup tequila
Step by Step
Rub the lime wedge around 4 stemmed glasses.  Place the sugar on a small plate and run the rim of each glass through the sugar.   Place two scoops of sorbet in each glass and pour 2 tablespoons of tequila over sorbet.  Garnish glass with lime wedge and serve immediately.  Optional: Sprinkle with lime zest.
IMG_7038